
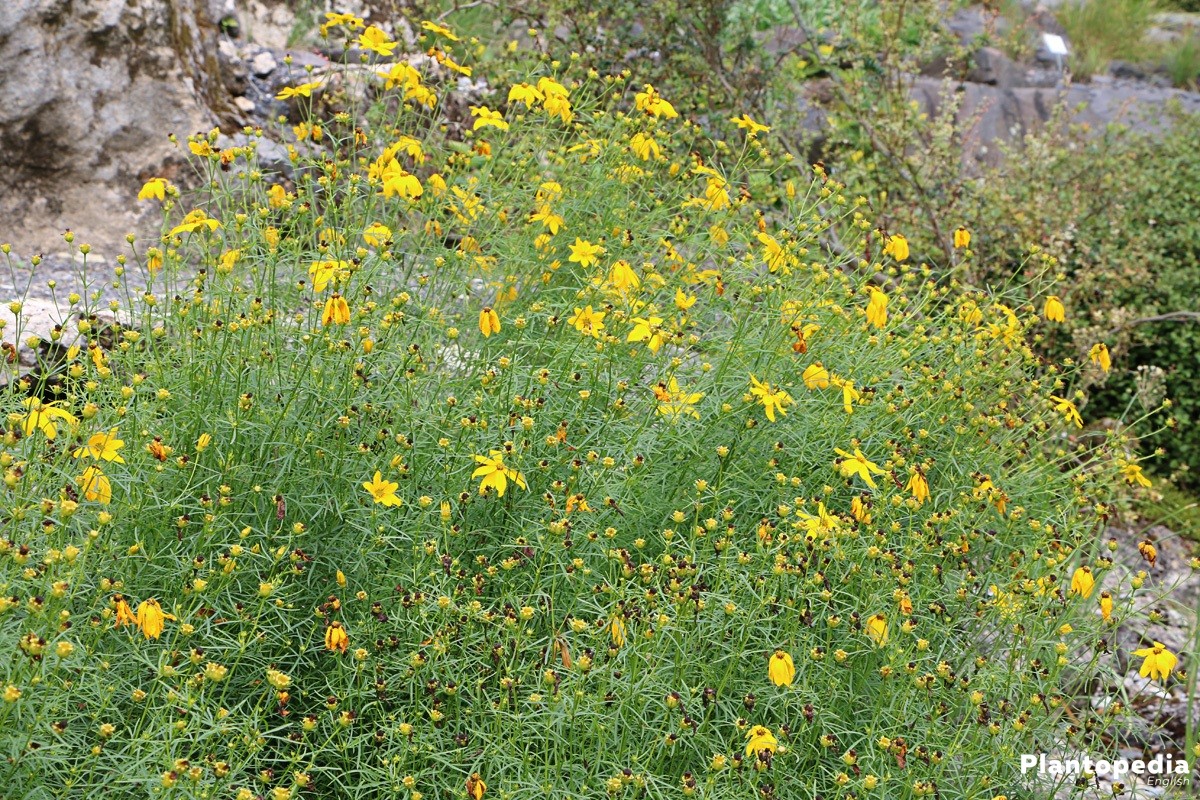
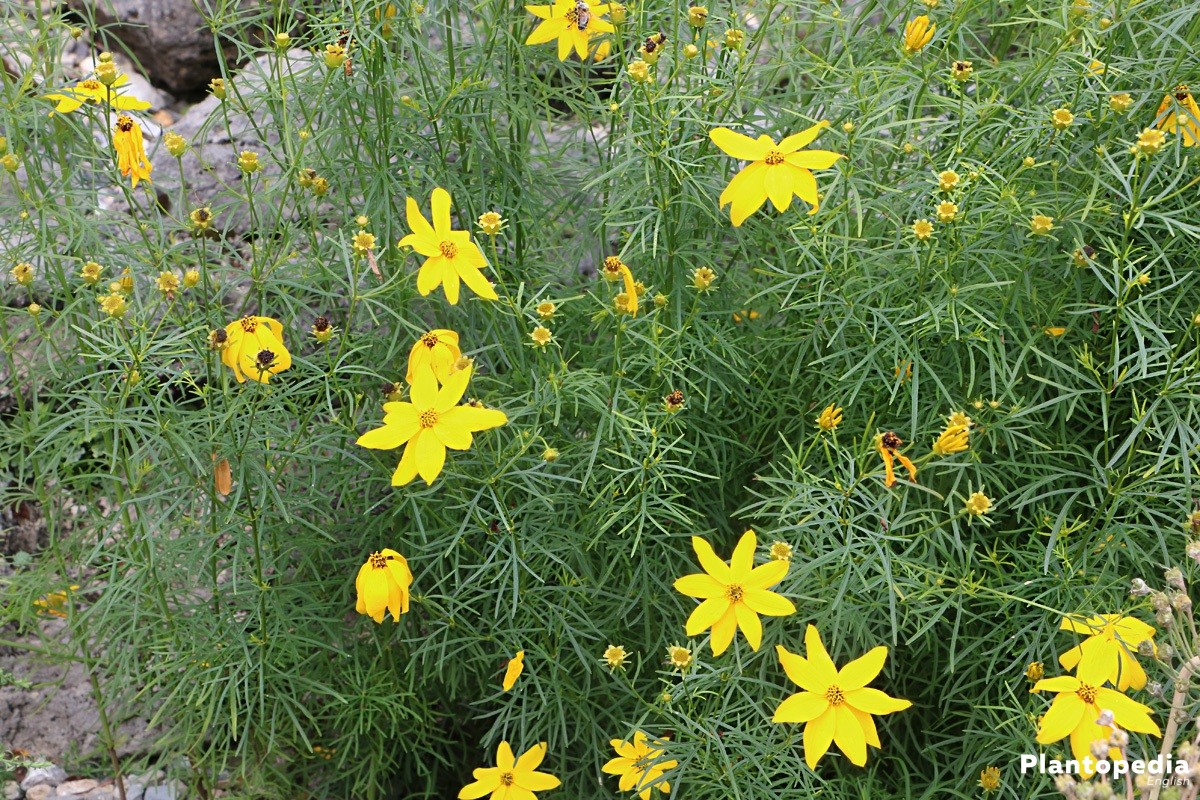
Plains coreopsis shine in bright yellow in the garden. The basket-shaped blossoms are as charming as a girl’s eyes with their dark circles. Only few plants are as grateful as the Calliopsis, even with minimal effort put into caring. The more they are cared for, the more beautiful are their blossoms. Hence, we show you in this manual how to care properly for the Coreopsis.
Plant Profile
Contents
- Plant family: composites
- Species: Calliopsis
- Type: Euasterides II
- Trivial name: Calliopsis, Coreopsis
- Origin: North America, South East America
- one-year, herbaceous, enduring plant
- Height: mostly up to 60 cm, with ideal environment up to 160 cm
- Heyday between July and October
- Shiny yellow blossom with red/brown centre
- lanceleaves or feathered leaves
- Propagation via scions or cutting the tuber
Their presence is so majestic, spoiled by the sun. Shiny yellow with dark button eyes the Calliopsis blossoms in the patch or at the side of the pavement. With a height of ca. 60 cm, it can also be used as an addition to a fresh bouquet. Coming from the family of composites, they are present in the new world today with 35 to 40 species. Its natural habitat in the past centuries has been Mexico, eastern North America, and the Andes.
In the world of flowers, the Colliopsis is considered to be always happy, an attribute that suits this medium-sized plant perfectly. The great number of blossoms look very elegance with their simplicity and look great in natural gardens. Insects also love the blossoms, from which they can gather delicious nectar.
Types and sorts
The family of Calliopsis contains ca. 35 different types. The most beautiful are probably the Coreopsis grandiflora Early Sunrise, the Coreopsis verticillata Rosea, or the Coreopsis grandiflora Goldtaler. Here, you can simply choose your type according to your taste.
Care
Fortunately, the Calliopsis is easy to care for. Planted as a summer flower, it has almost no requirements with regard to soil and care. With the following rules of thumb, you will recognize that you do not always need a green thumb for caring about garden plants. With the following basic knowledge and a bit of passion you will enjoy your Calliopsis the whole summer.
Location
In order to develop the entire beauty of the blossoms, the Calliopsis requires a spot in direct sunlight. Every flower, which does not like spots in full sunlight will be grateful about that. The greatest beauty will be achieved if the Calliopsis is in full sunlight, but protected from wind. It will develop a seductive smell and the maximum of blossoms.
Soil
From time to time it can also handle dry soil. The Calliopsis is well-placed here and can grow in different types of soil. A permeable and humic soil is ideal. However, a good balance of nutrients is required.
In order to get many blossoms one should provide:
- a well-permeable soil
- nutritious soil
- a layer of drainage, depending on the soil
- prevent waterlogging!
If you plan to cultivate Calliopsis in a bucket, you must choose a high-quality, nutritious soul. It is recommended to enrich the soil right away with long-term fertilizer such as wood chips. In order to receive a great number of blossoms, one can also enrich the soil with a large share of hummus from the compost. Waterlogging can be prevented by inserting a thin layer of gravel or expanded clay into the bucket first.
Sowing and propagation
Two options of propagation are available for Calliopsis: sowing of seeds or the division of the tuber. Both options work without struggles. Dividing the tuber might be the easier option A third option is the propagation with scions.
Sowing
The right timing is in March and April. You need a seed tray and some soil. A special potting compost is ideal in order to provide the required nutrients for the young plants. Put the seed onto the surface and cover it with no more than 0.5 cm. In order to keep the seeds in place, spray the surface with water and keep it moist.
The perfect location for the seed tray
Afterwards, the seed tray needs a bright and warm location with daily temperatures of at least 15° C. Direct sunlight should be prevented. The required humidity is achieved through the holes in the seed tray. If a different object is used, a transparent foil works, too. Be patient, because sprouting takes ca. six to eight weeks. The foil is removed as soon as the first sprouts are visible.
Division of the tuber
Division of the root ball
With a fixed location in the garden, the Calliopsis will be happy with the division of the root ball. This serves as a refreshing treatment, which is followed by a new heyday. This division can be done every three to four years in spring or fall. The plant is either removed from the bucket or from the bed with a garden fork.
Do not damage the roots! Afterwards, the root is cut into ca. fist-sized portions. Make sure every piece contains a few roots and buds. These pieces can be planted at the new location in the garden or a bucket.

Planting
Planting and repotting
The division of the root ball is equivalent to repotting or replanting. This enables you to find new locations in the garden or on the balcony for your Calliopsis. New plants from the gardening store should be planted into larger buckets right away. In the garden, a hole twice the size is being dug in which the plant and some hummus and soil is put.
Planting time
Although spring and fall are ideal for planting, fall is even better with its warm hours at noon.
Consider this:
- the hole must be at least twice the size of the root ball
- the distance between the root balls must be at least 30 cm
- with a natural long-term fertilizer such as hummus or wood chips, the plant will receive the required nutrients for the next generation
- the winter break is ideal for re-energising
Watering
Like every shrub, the Calliopsis loves a balance of moist soil. Generally, the free rain water is the best way of watering. When comparing, you can see how much better they will grow. If you do not have access to rain water, because your Calliopsis is on the balcony, you should let the water sit in the watering can for at least two days. Whether garden or bucket, the water must be able to drain. Waterlogging damages the roots.
Fertilizing
During the course of the year, green waste is being produced, which can be used at a later point. This organic fertilizer is the best base to make the Calliopsis blossom fully. Additionally, the plants are being supported during summer with extra care. You should do this every four to six weeks.
You can also use a long-term fertilizer, which is used according to the manufacturer’s instructions. Giving wood chips is also recommended. They are mixed into the soil slightly and watered. They will provide their nutrients slowly over the course of weeks.
Cutting
Generally, faded blossom must be cut. Spoil yourself with wonderful bouquets of Calliopsis! The more you cut, the more it will blossom. If you garden ecologically, only cut in spring before new buds are about to grow. This makes it easier for small animals and insects to find a way to get through winter. Additionally, the seeds of the flowers are available as nourishment for birds.
Winter
New American breeds of the Calliopsis are only limited in their ability to get through winter. Nevertheless, they have the potential to make it. The plants should be covered with leaves or deadwood to protect the root balls – in case they will stay in the ground through winter. You can also remove the root balls from the soil and repot them.
Then, they can be placed in a dry and cool greenhouse. Do not be confused by the description “one year Calliopsis” when buying. Often, plants are described as such because of their wintering abilities. It is worth it to let them live through winter in one way or another.
Propagation
With a bit of effort you can manage propagation. Again, fall is the perfect moment for the roots. Compared to sowing, the little plants have an advantage in spring.
- cut scions, remove leaves, and put into soil-sand mix
- remove spare leaves in the lower half
- dig a whole with a wooden stick and put the scion
- only spray with water
- cover with a plastic bag and fix with rubber ring
- insert small holes for oxygen provision
- place at a bright, warm place
- water regularly and check scions
- remove brown parts
- new roots come until March
Diseases
There is no doubt: a well-cared-for Calliopsis will enrich your garden as a strong and healthy plant. Nevertheless, it tends to develop blight under unfavourable weather conditions. This can be prevented with Ackerschachtelhalmtee.
Respective fungicides do also work. Real blight can become a true problem in a garden. The white blight on the plants’ leaves cannot be overseen. Remove every leaf with it and burn or remove it via the house trash. Do not put the leaves onto the compost!
Waterlogging is also bad. It makes the roots rot and the plant will die slowly. You can spot rotting roots from the distinctive smell and brown spots on the leaves.
In this case, do the following:
- remove the plant with the root ball
- cut rotten parts
- let the root ball dry and replant it
- install a good drainage for the new hole
Pest
Snails
Among all pest, the snail might be the worst enemy of the Calliopsis. The poor plants are loved by snails. Often, only regular collection of the snails can help. If you can establish a great environment for hedgehogs, they will love to eat the snails for you. You can also grow slug pellets to protect your Calliopsis.
Aphids
Aphids are also attracted and nest on the leaves. Unfortunately, they still important nutrients from the plant. Hence, these insects should be removed as soon as possible. Aphids are easily recognised – depending on the type, they are green, red/brown, or black/brown. Spray the plant with soft soap solution. The spraying should be repeated every two to three days until no aphids are present.


